Resolve Errors & Warnings
This page allows users to resolve errors and warnings present in the data, if any. Errors and warnings can be resolved individually or using the bulk actions on this screen. This page reflects the My taxLedger page in terms of its functionality.
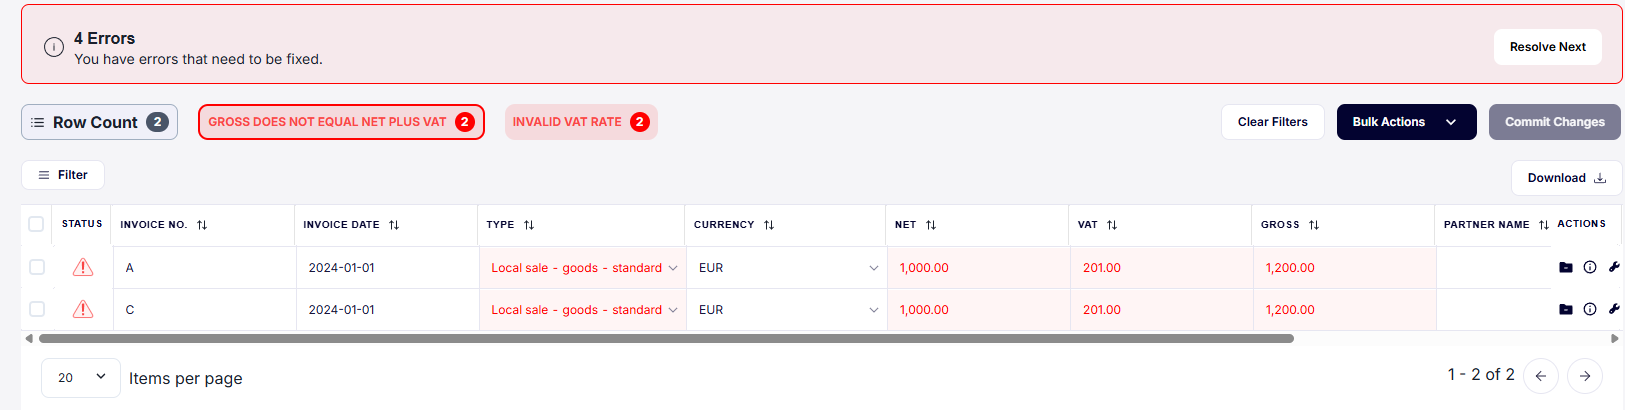
1. Resolve Next
The "Resolve Next" button guides the user through each error/warning sequentially. The system will ask you to resolve all errors before addressing any warnings. The current error/warning that the ledger is filtered for will be highlighted with a border as can be seen below:
2. Bulk actions
Bulk actions provide the user with the ability to change or update data in the system for multiple transactions at once. Bulk actions can function in 3 ways:
- Selecting the rows the users would like to perform the bulk actions on.
- Performing the bulk action without any filters; this will perform it on every transaction.
- Filtering down to transactions using the filters and then performing the bulk action on the filtered items.
Types of bulk actions:
| # | Bulk action name | Explanation |
|---|---|---|
| 1 | VIES Validation | This retries to validate taxnumbers that are flagged as errors. |
| 2 | Changing the reporting Period | This will change the reporting period of the selected transactions. |
| 3 | Recalculate Net | This will recalculate the Net amount. |
| 4 | Recalculate tax | This will recalculate the taxamount. |
| 5 | Recalculate Gross | This will recalculate the Gross amount. |
| 6 | Remove Transactions | This will delete transactions that are NOT archived or linked to a filing. |
Bulk actions cannot be undone. If you make a change using bulk actions, these will immediately be reflected by seeing changes on any Aggregation across the Wizard.
Manual Changing of Data
Users can still change the data manually in the system with an audit trail. Transactions which are archived or linked to a filed return cannot be altered.
This page is meant to function similarly to Excel. To update an amount, please click into the cell and make the change. Once you have manually changed any data, click ‘Commit changes’ and then Confirm to commit the changes.
Proceed
When all errors and warnings are resolved, click the Proceed button towards the right-hand side near the top of the page.